Adding WordPress plugins to your website can bring all sorts of wonderful functionality. Whether it’s a big-ticket item like a shopping cart or a smaller enhancement such as a related posts widget, there are endless possibilities.
But functionality is only part of the package. Many WordPress plugins also come loaded with their own CSS. Sometimes, those styles are quite noticeable on the front end of your website.
Theoretically, it can be a good thing. But some of this CSS is very opinionated. It can look significantly different than the styles you’ve already established on your website. Therefore, the more plugins you add, the more inconsistent your website’s look can become.
The good news is that there are a few different ways to tackle the problem. Today, we’ll introduce you to some techniques for keeping a plugin’s CSS from disrupting your UX.
Override the Plugin’s CSS in Your Theme
The first method for dealing with rogue plugin styling is fairly straightforward. But it does require a bit of patience. It involves finding any specific CSS classes or IDs that aren’t matching up with your site’s UI.
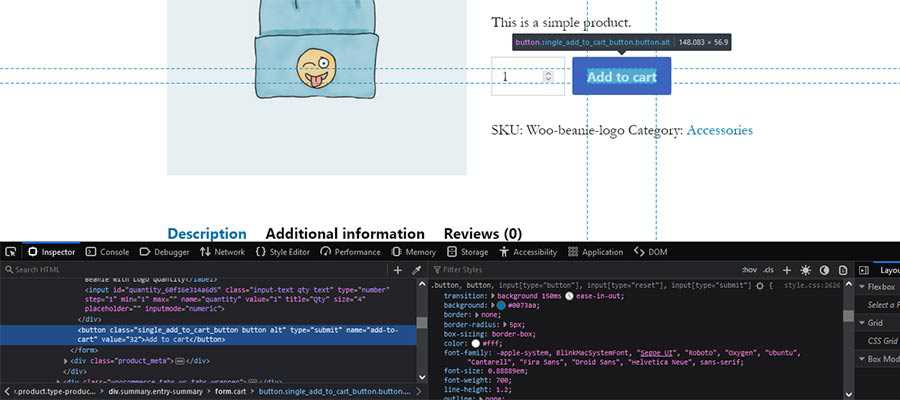
Locating the appropriate CSS requires some knowledge of your web browser’s developer tools. By right-clicking an element on the page and selecting “Inspect” (or “Inspect Element” in Safari), it will display the related HTML markup and CSS.

From there, it takes a little experimentation. For example, sometimes the element you right-clicked isn’t necessarily the one controlling the style. That requires navigating within the inspector’s HTML and clicking on things like parent containers or links.
It helps if you know what you’re looking to change. CSS background-color or font-size properties, for instance, can be easier to spot than some others.
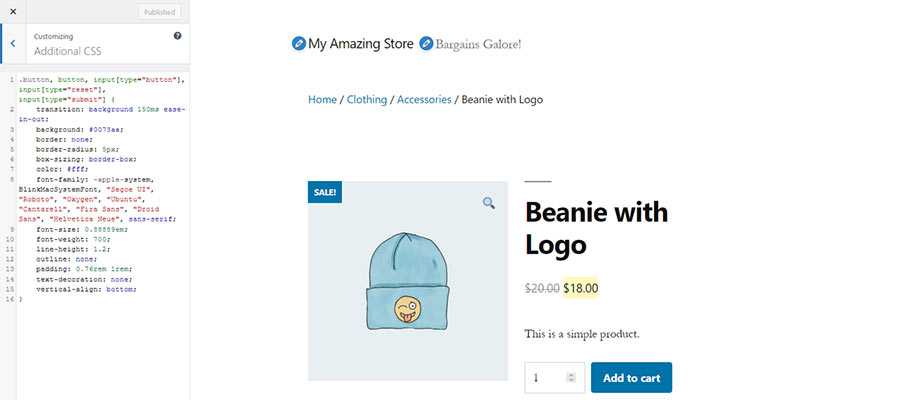
Once you find the correct styles, copy and paste them into your theme’s style.css file. Alternatively, you might also use Additional CSS panel within the WordPress Customize Screen and paste the code there (we’ll discuss other options below). Then, make any desired changes, upload or save.
Hint: You only need to include the CSS properties within a class or ID that you intend to change. Everything else can be omitted.

This technique is handy for situations when there are a small number of styles you’d like to change. However, it can be cumbersome if you want to make wholesale changes.
Dequeue Plugin Styles and Start from Scratch
This method requires a time commitment, along with some intermediate-to-advanced CSS skills. And you may even want to reserve it for situations where a plugin’s styles are really getting in your way.
We’re talking about using the WordPress wp_dequeue_style() function, which removes a previously enqueued stylesheet. This can be used to effectively turn off any stylesheets related to a plugin.
Once you’ve turned off a stylesheet, you can take the plugin’s styles and edit them however you like. It can be a big job, but also a way to ensure that the styles are exactly what you want them to be.
The WordPress Developer Resources site has a great example of how this is done. One of the keys to success here is finding the stylesheet’s registered name. This could be found within the plugin’s code, or you might also find it in the source of a front-end page, labeled as the stylesheet’s ID.

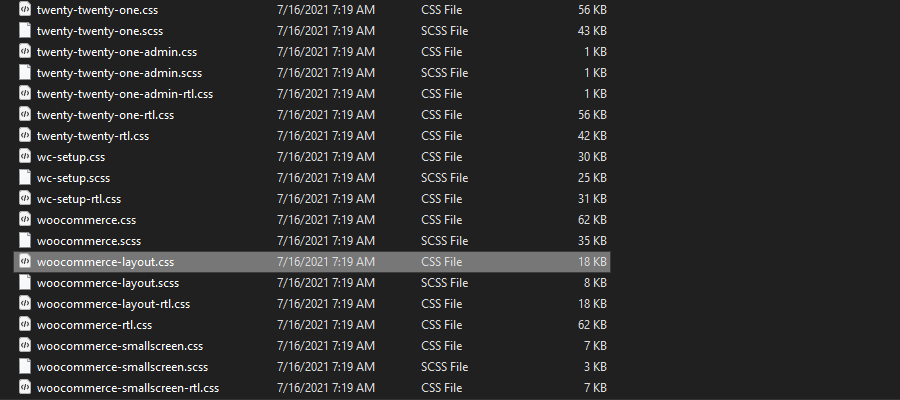
In addition, you’ll need the CSS associated with the plugin. Again, you’ll want to dive into the plugin’s folder to find the files you need. Their contents will need to be copied, pasted into your theme’s style.css and changed to meet your needs.

Still, there are plugins that have a lot of styles. WooCommerce is a prime example. It comes packed with a significant amount of CSS. The styles work well enough, but can sometimes clash with your theme.
If you want to dequeue all or just specific WooCommerce stylesheets, their documentation can guide you through the process.
More Tips and Troubleshooting
Getting a plugin’s CSS to bend to your will can be tricky. Things don’t always work the way you want them to the first time around. With that in mind, here are a few other tips and troubleshooting ideas to consider:
Check Plugin Documentation
In some instances, a plugin’s documentation can provide solid advice for implementing style customizations. In addition to the methods mentioned above, there may be other options – such as back-end settings or plugin-specific theming.
Also, be sure to check out support forums. The odds are that someone has already asked questions regarding custom styles. There may be some valuable information to help you along the way.
Experiment in the Browser’s Developer Tools
We already mentioned how important the browser’s developer tools are to finding the styles you want to override. They are just as crucial to troubleshooting when things don’t work as intended.
For instance, the inspector tool can help you determine where a custom style falls within the cascade. Another style may be taking precedent, or perhaps you’re viewing a cached version of the page.
Even better is that you can edit styles right within the inspector and instantly view the results. This will let you see what a change looks like before you deploy it.
These tools might become your best friend in squashing bugs. Get to know them!
Implement Changes in a Sustainable Way
If you’re going to spend time customizing a plugin’s styles, you’ll want to make sure they are implemented sustainably. That means placing them in a location where they’ll be safe from being erased or inadvertently changed.
Placing styles within your theme’s main stylesheet is OK – provided you know that they won’t be lost after a theme update. Child themes are a great way to protect against this.
To keep things better organized, it might be worthwhile to throw all of your custom styles into a separate stylesheet. This way, you’ll always be able to find those specific styles when you need to make a change.
In addition, keep a close eye on plugin changelogs. Styles do evolve, and what you customize today isn’t guaranteed to work forever.

Give Your WordPress Website a Seamless Look
In general, WordPress plugins are terrific. But it can be a challenge to get their associated styles to fit in with the rest of your website. Still, you can get there with a little bit of digging.
With the help of your web browser’s developer tools, you can locate the CSS classes and IDs you want to change. From there, it’s a matter of applying those changes in a way that works best for your needs.
It takes a keen eye, but the effort can really pay dividends. When every aspect of your website looks and feels consistent, it’s that much easier for visitors to navigate. In addition, content develops a natural flow. The user experience will be all the better because of it.
Top